
RCC House Construction Guide: Process, Cost & Timeline
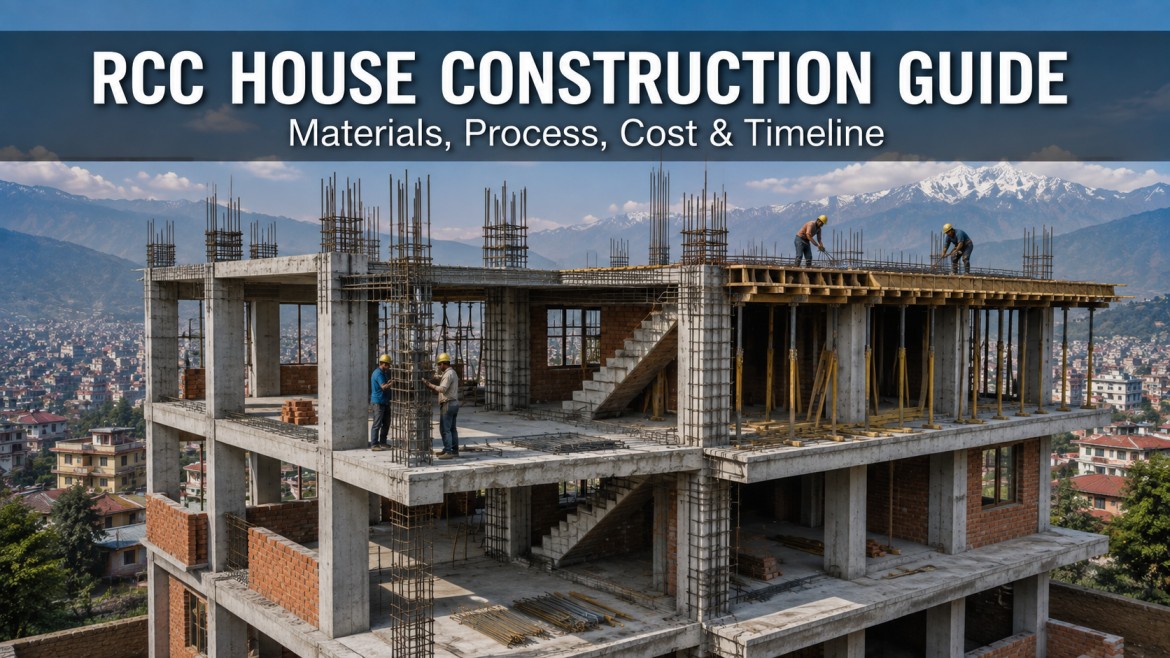
RCC stands for Reinforced Cement Concrete. It combines cement concrete with steel reinforcement bars (rebar) to create a structural framework. The concrete handles compre
Summarize With AI
Get a quick summary from your favorite AI model
Table of Content
- 1. RCC vs Load Bearing Structure: Which One Should You Choose?
- 2. The Complete RCC House Construction Process
- 3. Step 1: Planning and Design
- 4. Step 2: Permits and Approvals
- 5. Step 3: Site Preparation and Excavation
- 6. Step 4: Foundation Work
- 7. Step 5: Column and Beam Construction
- 8. Key things a good contractor checks here:
- 9. Step 6: Slab Casting
- 10. Step 7: Curing
- 11. Step 8: Brickwork and Wall Construction
- 12. Step 9: Plastering, Electrical, and Plumbing
- 13. Step 10: Flooring, Finishing, and Painting
- 14. Materials Used in RCC House Construction
- 15. How Long Does RCC House Construction Take?
- 16. What Affects RCC House Construction Cost?
- 17. Common Mistakes Homeowners Make During RCC Construction
- 18. Maintenance Tips for RCC Homes
- 19. Key Takeaways
- 20. Frequently Asked Questions
- 21. 1. What does RCC mean in construction?
- 22. 2. Is RCC construction better than brick construction?
- 23. 3. How much does RCC house construction cost?
- 24. 4. How long does an RCC slab take to cure?
- 25. 5. What is the ideal concrete mix ratio for a residential RCC house?
- 26. 6. Can I add another floor to my RCC house later?
- 27. 7. What is the difference between a footing and a plinth beam?
- 28. 8. How do I know if my contractor is using good quality steel?
- 29. 9. What causes cracks in RCC walls?
- 30. 10. How often should I inspect an RCC home for maintenance?
- 31. 11. What is shuttering in RCC construction?
- 32. 12. Is soil testing really necessary for a small house?
- 33. Ready to Start Your RCC House Construction?
RCC stands for Reinforced Cement Concrete. It combines cement concrete with steel reinforcement bars (rebar) to create a structural framework. The concrete handles compression the weight pressing down. The steel handles tension the forces trying to pull the structure apart or bend it.
Together, they create a structure that's far stronger than either material alone. That's the whole idea behind reinforced concrete.
Most modern homes use an RCC framed structure. This means columns and beams carry the load of the building, and the walls are just there to enclose space they're not load-bearing. This is different from older-style load bearing construction, where the walls themselves hold up the roof.
Why does this matter to you as a homeowner?
Because RCC framed structures give you more flexibility. You can have larger windows, open floor plans, and even add floors later (with proper engineering approval), since the columns and beams not the walls are doing the structural work.
RCC vs Load Bearing Structure: Which One Should You Choose?
|
Feature |
RCC Framed Structure |
Load Bearing Structure |
|
Cost |
Slightly higher upfront |
Lower upfront cost |
|
Flexibility |
High easy to modify layout |
Low walls can't be moved easily |
|
Earthquake resistance |
Better, when designed properly |
Weaker unless heavily reinforced |
|
Future expansion |
Easier (with engineering check) |
Difficult, often not possible |
|
Construction speed |
Slightly slower |
Faster for small structures |
|
Suitable for |
Multi-storey homes, modern designs |
Single-storey small homes |
For most homeowners today, especially anyone planning more than one floor or living in a seismic zone, RCC is the safer and smarter long-term choice.
The Complete RCC House Construction Process
Here's the step-by-step process, in the order your contractor should be following it.
Step 1: Planning and Design
Before any construction starts, you need:
• A finalized architectural layout
• Structural drawings from a qualified structural engineer
• Soil testing to determine the foundation type
• A clear budget and material specification sheet
Pro Tip: Never skip soil testing. The type of soil under your plot directly affects the foundation design. Skipping this step is one of the most common and most expensive mistakes homeowners make.
Step 2: Permits and Approvals
Every region has its own building bylaws covering setbacks, height restrictions, and floor area ratio. Before breaking ground, make sure you have:
• Approved building permit from your local municipal authority
• No-objection certificates where applicable
• Utility connection approvals (water, electricity, sewage)
Construction without proper approval can lead to fines, stop-work orders, or even demolition in serious cases. It's not worth the risk.
Step 3: Site Preparation and Excavation
This includes clearing the plot, marking the layout according to approved drawings, and excavating for the foundation. At this stage, your contractor should also plan for:
• Temporary site fencing
• Material storage area
• Drainage during monsoon or rainy months
Step 4: Foundation Work
The foundation carries the entire load of the building down into the soil. Depending on the soil report, this could be:
• Isolated footing for smaller, lighter structures
• Combined footing when columns are close together
• Raft foundation for soft soil or heavier loads
• Pile foundation for very weak or waterlogged soil
Once the footing is cast and cured, the plinth beam is constructed. This ties all the columns together at ground level and prevents differential settlement.
Step 5: Column and Beam Construction
This is where the actual RCC framework starts taking shape. Steel reinforcement bars are cut, bent, and tied according to the structural drawing. Shuttering (formwork) is placed around the steel cage, and concrete is poured.
Key things a good contractor checks here:
• Correct spacing between reinforcement bars
• Proper concrete cover over steel (usually 25–50mm depending on the member)
• Vertical alignment of columns using a plumb bob or laser level
• Concrete mix ratio matching the structural grade specified (commonly M20 or M25 for residential work)
Step 6: Slab Casting
Once columns and beams for a floor are complete, the slab is cast. This forms the floor of the level above (or the roof, if it's the top floor).
Slab work involves:
1. Fixing the shuttering plywood and support props
2. Laying the steel mesh reinforcement
3. Pouring concrete in one continuous operation (avoiding cold joints)
4. Vibrating the concrete to remove air pockets
5. Leveling the surface
6. Starting the curing process immediately
Warning: Never remove shuttering props early. Slabs need to cure and gain strength before they can support their own weight, let alone the weight of the floor above. Removing props too soon is a leading cause of slab collapse during construction.
Step 7: Curing
Curing means keeping the concrete moist for a set period so it gains full strength. This is one of the most overlooked steps in residential construction.
• Minimum curing period: 7 days for regular strength gain
• Ideal curing period: 14–28 days for full strength
• Method: Regular water spraying, ponding, or wet gunny bags
Skipping proper curing weakens the concrete significantly, even if everything else was done correctly.
Step 8: Brickwork and Wall Construction
Once the RCC frame for a level is complete and cured, brick or block walls are built to fill in between the columns. This is when the building starts to look like an actual house.
Step 9: Plastering, Electrical, and Plumbing
Internal and external plastering, along with concealed electrical wiring and plumbing lines, are done at this stage. It's far easier and cheaper to plan these now than to break open finished walls later.
Step 10: Flooring, Finishing, and Painting
The final stage includes flooring, tiling, doors, windows, painting, and fixture installation. This is also when you'll do your final walkthrough before moving in.
Materials Used in RCC House Construction
|
Material |
Purpose |
What to Check |
|
Cement |
Binding agent |
Use branded cement, check manufacturing date |
|
Sand |
Fine aggregate |
Should be clean, free from silt and clay |
|
Coarse aggregate |
Strength and bulk |
Proper size grading (usually 20mm) |
|
Steel (TMT bars) |
Tension reinforcement |
Check for ISI/BIS certification |
|
Water |
Mixing and curing |
Should be clean, drinkable quality |
|
Admixtures |
Workability, waterproofing |
Use only as per engineer's specification |
Pro Tip: Always ask your contractor for material test reports, especially for steel and cement. Reputable suppliers provide these without hesitation.
How Long Does RCC House Construction Take?
For a typical single-family home, here's a rough timeline breakdown:
|
Stage |
Approximate Duration |
|
Planning and approvals |
1–2 months |
|
Foundation work |
2–4 weeks |
|
Column, beam, and slab work (per floor) |
4–6 weeks |
|
Brickwork and plastering |
3–4 weeks |
|
Electrical and plumbing |
2–3 weeks (often overlaps) |
|
Flooring and finishing |
3–6 weeks |
|
Total (single floor home) |
5–8 months |
Multi-storey homes naturally take longer, and weather, material availability, and labor scheduling can all shift these timelines.
What Affects RCC House Construction Cost?
Cost varies a lot by region, but these are the main factors that influence your final number:
• Plot size and design complexity
• Number of floors
• Material quality (branded vs local)
• Labor rates in your area
• Finishing level (basic vs premium)
• Structural design requirements (soil type, seismic zone)
• Site accessibility for equipment and material delivery
Getting a detailed, itemized quote rather than a vague per-square-foot number helps you avoid surprises halfway through the project.
Common Mistakes Homeowners Make During RCC Construction
• Skipping soil testing to save time or money
• Choosing a contractor based on price alone, without checking past work
• Not hiring an independent structural engineer for design review
• Rushing the curing process
• Changing the design mid-construction without engineering approval
• Not documenting material brands and quantities in the contract
• Ignoring drainage and waterproofing until problems appear
• Failing to inspect reinforcement before concrete is poured
Maintenance Tips for RCC Homes
• Check for hairline cracks every year, especially after monsoon season
• Keep terrace drains clear to prevent water stagnation on the slab
• Re-apply waterproofing on exposed slabs every 3–5 years
• Watch for rust stains on ceilings or walls an early sign of reinforcement corrosion
• Get a structural inspection every 5–10 years for older homes
Key Takeaways
• RCC construction uses concrete and steel together for strength and durability
• Soil testing and a proper structural design are non-negotiable first steps
• Curing time affects final strength as much as the concrete mix itself
• A single-floor RCC home typically takes 5–8 months to complete
• Choosing a contractor on price alone is the most common costly mistake
Frequently Asked Questions
1. What does RCC mean in construction?
RCC stands for Reinforced Cement Concrete. It's a building method that combines cement concrete with steel bars to create a strong, durable structural frame.
2. Is RCC construction better than brick construction?
RCC framed structures are generally stronger and more flexible than plain load-bearing brick construction, especially for multi-storey homes or areas prone to earthquakes.
3. How much does RCC house construction cost?
Cost depends on your location, plot size, number of floors, and finishing level. Always get a detailed, itemized quote rather than relying on a flat per-square-foot rate.
4. How long does an RCC slab take to cure?
A minimum of 7 days is required, but 14 to 28 days of proper curing gives the concrete its full design strength.
5. What is the ideal concrete mix ratio for a residential RCC house?
Most residential structures use M20 or M25 grade concrete, but the exact ratio should always come from your structural engineer's design, not a generic rule of thumb.
6. Can I add another floor to my RCC house later?
Often yes, but only after a structural engineer confirms the existing foundation and columns can support the extra load.
7. What is the difference between a footing and a plinth beam?
The footing transfers the building's load into the soil. The plinth beam sits above the footing and ties all the columns together at ground level.
8. How do I know if my contractor is using good quality steel?
Ask for the manufacturer's test certificate and check that the bars carry proper ISI/BIS markings before they're used.
9. What causes cracks in RCC walls?
Common causes include poor curing, incorrect concrete mix, foundation settlement, or skipping expansion joints in larger structures.
10. How often should I inspect an RCC home for maintenance?
A basic check every year and a professional structural inspection every 5 to 10 years is a reasonable schedule for most homes.
11. What is shuttering in RCC construction?
Shuttering, or formwork, is the temporary mold (usually plywood or steel) that holds wet concrete in shape until it hardens.
12. Is soil testing really necessary for a small house?
Yes. Soil testing determines the correct foundation type for any structure, regardless of size, and skipping it is a major risk factor for future settlement issues.
Ready to Start Your RCC House Construction?
Building a home is one of the biggest investments you'll make, and the quality of your RCC work will affect your house for decades. Working with an experienced team that follows proper structural design, quality materials, and correct curing practices makes all the difference between a home that lasts and one that needs constant repair.
If you're ready to move forward, our team can walk your site, review your plans, and give you a clear, honest quote no pressure, no guesswork. Contact us today for a free consultation and take the first confident step toward building your home.
Community
Likes and comments
Like the post if it helped you, and leave a comment to share your experience. Every comment is reviewed by our admin team before it appears publicly.
Want to join the conversation?
Sign in to leave a comment. Every comment is reviewed by our admin team before it becomes public.
Log in to commentApproved comments
Showing the latest approved conversation for this post.
No approved comments yet
Be the first to start a conversation once your comment is approved.